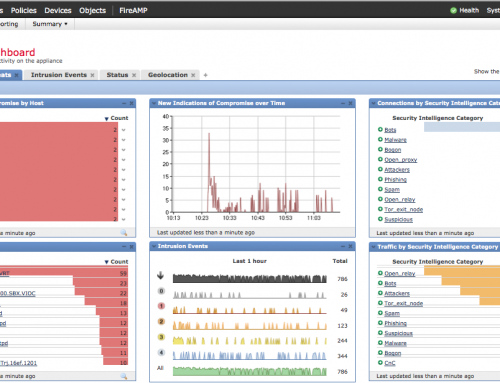
We’ll walk you through step by step how to backup and restore FirePOWER Management Center, formally called SourceFire FireSIGHT Defense Center.
If you can access the Web UI of the Management Center, it may be possible to create a backup of the configuration and event data so that you can restore to those after re-imaging your DC. Please see the procedures below.
Backup FirePOWER Management Center
Important! If you configured any interface associations with security zones, these associations are not backed up. You must reconfigure them after you restore.
To create a backup file of a Management Center:
Step 1:
Select System > Tools > Backup/Restore.
The Backup Management page appears.
Step 2:
Click on Defense Center Backup. Then Create Backup page appears.

Step 3:
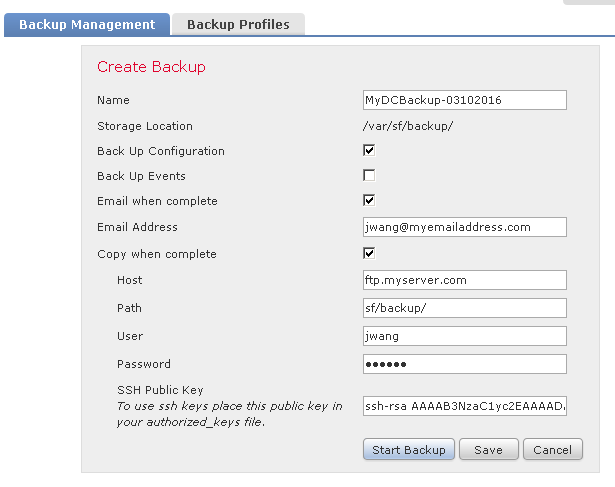
In the Name field, type a name for the backup file. You can use alphanumeric characters, punctuation, and spaces.
Step 4:
On Defense Centers, you have two further options:
- To archive the configuration, select Back Up Configuration.
- To archive the entire event database, select Back Up Events.
If the event history is not very important to keep, I recommend uncheck this option by not backing up all the Events.
Step 5:
Optionally, to be notified when the backup is complete, select the Email check box and type your email address in the accompanying text box.
Note! To receive email notifications, you must configure a relay host.
Step 6:
Optionally, on Management Centers, to use secure copy (SCP) to copy the backup archive to a different machine, select the Copy when complete check box, then type the following information in the accompanying text boxes:
- In the Host field, the hostname or IP address of the machine where you want to copy the backup
- In the Path field, the path to the directory where you want to copy the backup
- In the User field, the user name you want to use to log into the remote machine
- In the Password field, the password for that user name
If you prefer to access your remote machine with an SSH public key instead of a password, you must copy the contents of the SSH Public Key field to the specified users authorized_keys file on that machine.
With this option cleared, the system stores temporary files used during the backup on the remote server; temporary files are not stored on the remote server when this option is selected.
It is recommended that you periodically save backups to a remote location so the appliance can be restored in case of system failure.
Step 7:
You have the following options:
- To save the backup file to the appliance, click Start Backup.
The backup file is saved in the /var/sf/backup directory. You can direct the backup file to a remote location.
- To save this configuration as a backup profile that you can use later, click Save As New.
You can modify or delete the backup profile by selecting System > Tools > Backup/Restore, then clicking Backup Profiles. See Creating Backup Profiles for more information. To see the status of a running backup, go to System > Monitoring > Task Status.

Restore FirePOWER Management Center from Backup
You can restore the appliance from backup files using the Backup Management page. To restore a backup, the VDB version in the backup file must match the current VDB version on your appliance.
To restore from a backup, go to System > Tools > Backup/Restore and select the backup file you want to restore from. If your backup is on a remote location, you need to upload the file to the system by clicking Upload Backup first. Click on Restore so the process will start.

After you complete the restoration process, you must apply the latest Rule Update.
If your backup file contains PKI objects, private keys associated with internal CA and internal certificate objects are re-encrypted on upload with a randomly generated key.
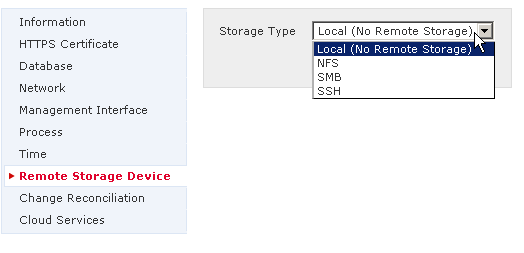
If you use local storage, backup files are saved to /var/sf/backup, which is listed with the amount of disk space used in the /var partition at the bottom of the Backup Management page. On Management Centers, select Remote Storage at the top of the Backup Management page to configure remote storage options; then, to enable remote storage, select the Enable Remote Storage for Backups check box on the Backup Management page. If you use remote storage, the protocol, backup system, and backup directory are listed at the bottom of the page.
Step 1:
Select System > Tools > Backup/Restore.
The Backup Management page appears.
Step 2:
To view the contents of a backup file, click the name of the file.
The manifest appears, listing the name of each file, its owner and permissions, and its file size and date.
Step 3:
Click Backup Management to return to the Backup Management page.
Step 4:
Select the backup file that you want to restore and click Restore.
The Restore Backup page appears. Note that if the VDB version in the backup does not match the VDB version currently installed on your appliance, the Restore button is grayed out.
Caution! This procedure overwrites all configuration files.
Step 5:
To restore files, select either or both:
- Replace Configuration Data
- Restore Event Data
Step 6:
Click Restore to begin the restoration.
The appliance is restored using the backup file you specified.
Step 7:
Reboot the appliance.
Step 8:
Apply the latest Cisco Rule Update to reapply rule updates.
Step 9:
Reapply any access control, intrusion, network discovery, health, and system policies to the restored system.
If you add licenses after a backup has completed, these licenses will not be removed or overwritten if this backup is restored. To prevent a conflict on restore, remove those licenses before restoring the backup, noting where the licenses were used, and add and reconfigure them after restoring the backup.
In this session we covered how to backup and restore FirePOWER Management Center or Defense Center in greater details. It is recommended that you save the backup task in the Backup Profiles and schedule a reoccurring job to run the backup automatically and in certain intervals you feel comfortable with. It can be daily backup, weekly or monthly. It depends on how frequently you change the system configuration and whether you want to back up the events or just the configuration.
Continue reading:
Configure and Manage ASA FirePOWER Module using ASDM
Configure and Manage ASA FirePOWER Module using Management Center
How to Upgrade SourceFire FirePOWER FireSIGHT Management Center
I have written a quick start guide setting up Cisco’s next-generation ASA-X with FirePOWER service. You can download the configuration template for free.
Cisco ASA 5506-X FirePOWER Configuration Example

